Although some tomato gardeners are up the challenges that come with growing tomatoes from seeds, many are not. In this article, I will give to you 5 of the major factors you need to consider if you want to grow tomatoes from seeds.
Can be expensive if you don’t know how
If you are new to tomato gardening then it’s probable that you won’t know exactly what is most important when it comes to growing tomato plants. This is very evident if you are going to be growing your tomatoes from sees, as there are a number of things up for sale that are perceived as necessary. Many of the things however, can be omitted, and you will still get a great tomato garden.
It’s a long process
Not only do you have to pay constant attention to your seedlings, you will need to wait a considerably longer time for your tomato plants to produce tomatoes. You need to continuously check on soil moisture levels and ph levels. If you are in a hurry to get you tomatoes from the garden, then growing them from seeds may not be the best option.
You crops may fail
Growing tomatoes from seeds is a delicate process. One that must be constantly monitored. If you are new to growing tomatoes, then there is a possibility that your first crop may not be quite what you expected. Being new to tomato gardening shouldn’t stop you though. It just means that you need to work a little harder.
Seedlings are prone to disease
Very young tomato seedlings can get diseased quite easily. You need to make sure that the soil is not to damp, and have a sharp eye for spotting irregularities. A risk is that if you don’t spot the disease, and plant the seedling in your tomato gardened, the other plants may get the disease as well. This may ruin your entire tomato garden.
Transplanting can be very difficult
Even for experienced tomato gardeners, the process of transplanting seedlings is a delicate one. If you even a little too rough, you can damage the plant, which may cause it to not bear tomatoes later on. You need to be extra cautious when transplanting the seedlings and you need to know exactly what to do.
Even though it’s exciting to grow tomato plants from sees, it can be a difficult process. If you are not willing to put in the extra effort, then you probably won’t get a bumper harvest.
Rabu, 29 Desember 2010
Rabu, 22 Desember 2010
How to Grow Tomatoes Without a Yard
Would you love to start a tomato garden, but you don't have any land to grow your tomatoes in? Many people find that they want to take on tomato gardening, but feel that they cannot, due to a lack of having a large. Well, even if you live in an apartment, without a garden, this article will show you how to grow tomatoes without a yard.
An easy option when it comes to growing tomatoes without having any land is to use a tomato planter. They are basically little containers in which to grow tomatoes. Many stores sell them, and they come in a wide variety of sizes and materials.
A free alternative to buying tomato planters is to use a container as a substitute. This is a much more cost effective option for growing tomatoes, as just about any container will do. I have had success growing the tomatoes in old buckets. All you have to do is to drill a couple of holes in the bottom of the bucket for water to filter through.
I recommend that you get a large tomato planter (or whatever type of container you are using) as tomato plants can grow really large. The last thing that you want to do is to restrict the size which your tomato plants grow to. A larger container, with more soil, will also retain water for longer therefore you will need to water your tomatoes less often.
Since you are looking to grow tomatoes without having any outside land, you can place the containers on your porch, as they will be close to sunlight and fresh air. Just make sure though, that the tomato plants are not exposed to outside conditions, such as frost. If you cannot find space on your porch, then place them in a room where the tomatoes will be close to a large window. You should keep curtains open so that maximum sunlight can enter the room.
Be sure to get yourself some high quality planting soil. Most gardening stores will sell organic growing soil, and this is a great option as the soil has all the nutrients you tomatoes will need to grow big and juicy. Avoid flower potting soil, mainly because of the fact that their ph and nutrient levels are not conducive to growing veggies.
Now that you know it is possible to grow tomatoes without yard space, you can finally attempt to grow your tomato plants. Just remember to get a large container (if you are not going to be using a tomato planter), organic tomato growing soil.
Sabtu, 18 Desember 2010
Freckles
 |
| Scabitha |
One person's beauty mark is another person's mole. So it is, I think, with “freckles” on tomatoes. My first experience with this trait was with seed I got in trade of the variety Scabitha, which was attributed to Brad Gates at Wild Boar Farms. I was impressed. The fruit was meaty and tasty and the skin had random gold flecks that were interesting and unique. One of the plants from this seed appeared to be an outcross, with smaller heart shaped fruit and a different expression of the “freckles” trait. I made a cross to the true-to-type Scabitha, and saved OP seed from the odd ball.
 |
| Freckled Strawberry |
 |
| Dora x Scabitha F1 |
 |
| Mature/Immature fruit |
Here’s a photo showing the Gold Fleck phenotype on immature green fruit and on a mature red fruit. In my various Freckled Strawberry lines the green fruit stage is heavily peppered with black dots, which will later turn gold. Although high expression of the pox phenotype is a little over the top, moderate freckling in the F1/F2's look interesting. There does not appear to be any relationship between "freckles" and any important horticultural traits (e.g yield, taste or fruit texture).
 |
| Immature Freckled Strawberry |
 |
| Freckled Child |
A few other observations: the “freckled” phenotype is influenced by environment, with higher expression later in the season; one F2 plant appears to have pox, without gold fleck – so maybe these conditions are somewhat independent; and there are other freckled phenotypes that are probably not related (e.g. WBF Freckled Child).
An August 2011 update: in a new “freckles” breeding line I was able to find a plant with fruit that had gold fleck (freckles) and without fruit pox (scabs). Interestingly in this fruit the freckles seemed to align in a fashion that suggested lateral “stripes” of gold spots. I crossed this plant to a darker skinned/fleshed tomato hoping for gold on dark purple. That’s a combination you can’t do with the gs (green stripe) gene – see the breeding for stripes blog entry. Also this year we found an unusual variation on the freckled phenotype in a F3 plant from the cross Scabitha x Boar's Hoof -freckles w/o pox, but the freckles are tan, not gold.
 |
| Freckles in stripe pattern |
 |
| (Boars Hoof x Scabitha)F3 |
Sept 2013 update - We have been able to introgress Aft (anthocyanin fruit) into our Freckled Strawberry germplasm. The desired effect was gold freckles on a indigo skin (like bright stars on a night sky). This is a work in progress, but looking interesting. In this photo there are two fruits from the same plant, one fully ripe from deep in the canopy (no direct sun, no anthocyanin) and one from the top of the plant (below in photo) showing anthocyanin accumulation on the side of the ripening fruit exposed to the sun. We like the look of these, but they are not yet stable.

The photo below was taken at our NC breeding nursery in July 2014. Two plants in a row of a hundred showed this very striking gold freckles on indigo.

Jumat, 17 Desember 2010
Why are my Tomato Plants Wilting every day?
Have you ever found that the very next day after watering your tomatoes they wilt? So, what causes tomato plants to wilt every day? If, after you water your tomato garden, your plants are fine, but the next day they start to wilt, then this post is for you. In this post, I will look at some of the causes of tomato plants wilting a day after watering.
Very hot weather
If you live in an extremely hot climate, or have just had a few weeks of higher than average temperature, then your tomatoes may lack the constant water that they need to remain firm and upright. If you find that the plants perk up by the following day, then this is the most probable cause. A simple way to overcome this problem is mulching. You can either make your own mulch, or purchase a readymade one. If you are making your own, then try shredding up some newspaper, or even better, some hay. Just apply a thick layer of mulch at the base of your tomato plants. This not only traps moisture in the soil for longer, it also aids in preventing tomato diseases from spreading.
Not watering deeply enough
This is the most common cause for tomato plants wilting every day. If you are watering your tomatoes too shallow, then the plants will develop root hairs close to the surface. This will increase water loss, as temperatures are higher near the surface. It is vital that you water your tomatoes to about an inch deep. A simply way to measure this, is to place a dry plastic ruler into the soil and then water a bit at a time. Constantly pull the ruler from the soil, and see how much of it is wet.
Watering your tomato plants too deeply
Overwatering your tomato garden may also cause the problem of wilting plants. You see, the root hairs will be damaged if you over water the tomatoes, and this will reduce the amount of water the plant takes in. this problem will naturally sort itself out after a while, as it takes time for new root hairs to grow back. In the future, just be careful to not water your tomatoes too often.
There are other reasons which may cause your tomato plants to wilt every day, but the ones I have mentioned are the most common. Now that you have more information, I hope that your tomato garden will flourish with great tomatoes.
Rabu, 15 Desember 2010
What causes home grown tomatoes to remain small?
Are you an avid tomato gardener who loves growing tomato plants? Well, if you are, then you would have surely experienced that your tomatoes are sometimes small, even though you bought high quality organic tomato seeds. If you have, then you will certainly want to figure out the reason, so that your next batch of tomatoes grows large and juicy. So, exactly what causes home grown tomatoes to remain small? In this post, I will look at some of the major causes for tomatoes not growing to full size.
Small variety tomatoes
Even if you have used store grade, organic tomato seeds, some varieties of tomato plants will just not produce large tomatoes. Certain types of seeds will produce tomatoes that become fully mature at a small size, and these tomatoes will ripen like normal tomatoes. Your local gardening store may only supply seeds for the smaller varieties (like cherry tomatoes). If this is the problem that you have, then try purchasing your organic tomato seeds online. By buying them this way, you will have a wider selection of tomato seeds to choose from, and you can be sure to find seeds which will produce larger tomatoes. I suggest that you try to get the big boy variety, as the tomatoes are huge and full of flavor. They are also one of the simplest types to grow.
Lack of water
This is another major factor which causes home grown tomatoes to remain small. You may be using seeds which are supposed to produce bigger tomatoes, but if you do not know how to water your tomato plants, then you may get small tomatoes. You need to ensure that your tomato plants have adequate water to produce large fruit. Remember that most of a tomato is water, and therefore a lack of it will cause stunted growth. Try to water your tomatoes every day if you live in a hot climate. The best time to water you garden is early in the morning, so you plant can absorb all it needs, and excess water can evaporate.
Now that you know what causes homegrown tomatoes to remain small, I'm sure that your next crop will not have any problems. Just keep in mind that you need to choose a type of tomato that naturally grows bigger, and that you need to water your tomato garden daily. Follow these simple steps, and you can have huge tomatoes, right in your own garden.
Selasa, 14 Desember 2010
Garden Bloggers Blooms Day
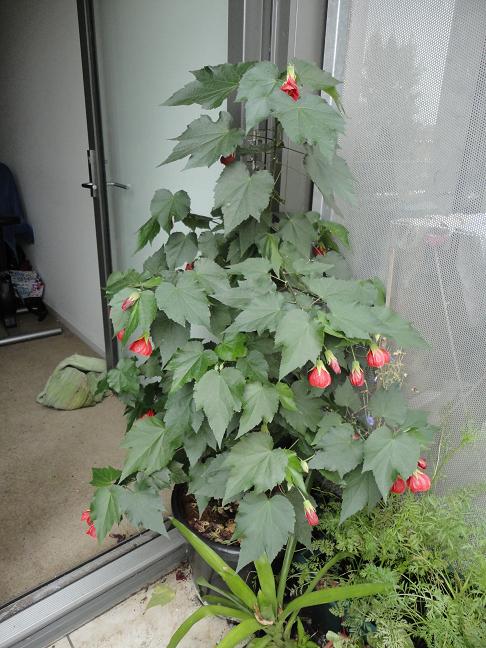
Unless you are a Japanese Lantern, a zuke, a cuke, a pumpkin, or a lemon tree then you aren't blooming in my garden this month. Things go a bit greeny brown this time of year with tomatoes wilting early and the corn following suit. Blossom is long gone and the pansies, primroses and other annuals have given up finally after a valiant battle. The only things giving a spot of colour to the balcony garden are the amazing japanese lantern. (I really should invest in another one.)

The cukes, zukes and pumpkins are still flowering, though not a lot of fruiting is going on. It is hard to hand pollinate when they are only producing one sex of flower! Come on plants, coordinate yourselves.


And the lemon tree as usual is putting out blooms, with a few turning into possibly viable fruit.

Are you having more success with blooms in your garden this month? For more Garden Bloggers Blooms Day head on over to May Dreams Gardens and join in the fun.
Christmas Succulent 2010
Long ago I had a housemate who wouldn't let me put up a Christmas tree. So instead, I navigated this command by erecting a Christmas succulent instead. That ginch hasn't lived here in a long time but the Christmas succulent tradition has stayed and I even gave away some little succulents last year so everyone could one day have a Christmas succulent. This year it is a little one, which was destined for pastures elsewhere but has stayed on to give us all some Christmas cheer. The usual ornaments have returned

Along with the requisite black star

And voila, one lovely Christmas succulent, that wont drop pine needles and needs no care, attention or water!


Along with the requisite black star

And voila, one lovely Christmas succulent, that wont drop pine needles and needs no care, attention or water!

Senin, 13 Desember 2010
Harvest Monday - tomato porn

Harvest Monday is brought to you today by gratuitous shots of tomatoes and the spring awakening of the corn. The week itself began with a corn, a baby corn just busting out of its little husk. I just wanted to see how it looked, how it grew, so I ripped it off way too early.

When I removed its clothing here is what I found ...

One tasty little broken baby corn. Mmmmmm so good. Then the week descended into an orgy of produce, from greens to zukes to basil to tomatoes to carrots and more, all vying for a position on my salad plate.

Then, ok, you waited for it, here is the tomato porn. The first big harvest, complete with garlic in a martini glass.


They went on top of a yummy lasagne I cooked tonight (using my BBQ no less because my oven is still on the fritz) And what started the week with a sizzle took it out with a bang. Another corn

Another undressing

But this time the star was fully grown, fully formed, and extra tasty.

I didn't even need to cook it, just dived on in and at the whole thing raw.

What will next week's harvest bring? If you want to see more harvest head on over to Daphne'sDandelions for the full show.
Growing Tomatoes Indoors-3 tips for a Bumper Harvest
Growing tomatoes indoors are super fun! They are easy to grow, don’t require too much attention and they are relatively maintenance free. There are however, some common things that you need to be area of when you are growing tomato plants. In this article, I will give to you 3 tips that will assist in ensuring that your tomato plants are healthy, and the tomatoes are full and plump!
Choose a crack resistant variety of tomato plants- They grow better indoors
Most gardening stores sell a wide variety of tomato seeds. When you are growing tomatoes indoors, you should ask you dealer which type will produce be the most resistant and hardy plants. Remember that although you can control most of the conditions indoors, a hardy tomato plant will have a better chance of producing that bumper crop.
Buy seed starting soil mix - Has balanced nutrients and ph
A simple tip for both beginner and more experienced tomato gardeners alike is to start off your indoor tomato garden with buying starting soil. This is basically a well mixed soil, which has the correct balance of soil nutrients and a favorable soil ph. This will ensure that your young tomato plants are healthy sand grow well. Starting soil for tomato gardening is inexpensive, and it will go a long way in giving you a great batch of tomato plants (which mean tastier fruit).
Plant tomato seeds in small trays first, and then move to indoor pot (germination)
If you are going to be growing you indoor tomato garden from seed, then you need to first germinate the seeds before you transfer them to the actual growing container. There has been a lot written about germinating tomato seeds, but I will simply the process a little here. Ensure that you use a high nutrient content soil (preferably organic) to plant the seeds in. plant your seeds shallow, about half a finger deep. Water the seeds thoroughly the first time and then leave the seed tray in a warm, dry area. Once the seedlings are about 5 cm tall (above ground) you can move them to their growing container and begin your indoor tomato garden.
There you have it folks. Three quick tomato growing tips that will help ensure that your indoor tomato garden is healthy and full of delicious fruit. Hardy tomato varieties have a better chance of survival. Using a high quality starting soil mix will ensure healthy tomato plants. Germinating seeds before planting is a must if you want a bumper harvest.
Minggu, 12 Desember 2010
Growing tomatoes from seeds–5 things you must know before you begin
Enthusiastic tomato gardeners know that there is a certain thrill you get from growing tomatoes from seeds. If are considering doing it to, and you want to get nice, big red tomatoes, there are a few things that you need to know before you begin.
It’s a very time consuming process
Before you begin growing tomatoes from seeds, you need to understand that it’s a long and sometimes difficult process. You need to have the time to spend monitoring their growth, ensuring that the soil is well watered and has adequate nutrients, and you need to constantly be on the lookout for tomato disease.
What type of soil is best for germinating tomato seeds?
This is the first bit of information you need to know. When you are growing tomatoes from seed, the type of soil that you use is vital to the success of your tomato plants. The best choice you can make when it comes to soil for organic tomato seeds, is to purchase staring soil. Most store sell a variety of these mixes and you can choose from organic, or not and also choose a soil that will best suit the type of tomatoes you will be growing.
How to germinate organic seeds
Once you have your soil, you will need to learn how to germinate your seeds. Although this sounds like a simple plant and it will grow process, there are a number of variable that need to be taken into account. The temperature of the soil for example, needs to be kept fairly warm so that the seeds can germinate. You need to ensure that your tomato seeds have adequate water, but don’t allow the soil to become soggy, as the young seedling won’t grow.
How to transplant tomato seedlings
Once you have your little seedlings, you have to transplant them into their growing containers. This is a very delicate task, and you need to be careful that you don’t damage their young and tender stems. A good idea is to transplant the seedlings with their soil into the new tomato pot.
If you are inexperienced your seeds may not germinate
Although practice is the only way to get better at growing tomatoes form seeds, be prepared if your first crop isn’t a bumper harvest. If you want to be certain that you get a good crop the first time round, you need to be very careful. This is not to say that you should attempt growing tomatoes form sees if your still new to tomato gardening. On the contrary, the experience will make you a better tomato gardener.
Know that you have more information on growing tomatoes form seeds; you can decide whether or not you should try. I recommend that you do attempt it, as it’s quite interesting to watch toes go through the different stages of growth.
Sabtu, 11 Desember 2010
Crossing and Seed Saving
 There are several online sites that cover basic techniques for crossing and seed saving, and we've learned from all of them. One of the best on crossing is here. Here's a photo of Mark's crossing tool box: scissors for trimming back to a single flower, and when necessary for trimming petals during emasculation; a set of very sharp forecepts - the primary emasculation tool; colored wire ties to help you find the emasculated flowers the next day; a glass lens from a discarded pair of sunglasses, on which to collect and apply pollen; and some brightly colored tags to label the crossed flowers after pollination is complete. I also use reading glasses to better see what the heck I'm doing.
 |
| Emasculated flower ready for pollination |

 |
| Ripe fruit ready for F2 seed extraction |
 |
| Fermenting in zip lock bags |
I usually extract seed from the ripe fruit in the field (saving messing up the kitchen) and plop the seed and pulp right into a ziplock bag, labeled with a water proof sharpie. After fermentation in the basement for a few days, I wash the seed, dry and store in a coin envelope.
Growing Tomatoes from Seeds–4 reasons you should
When growing tomatoes you have a major choice to make, before you even consider gardening style. Are you going to grow your tomato garden from seeds or seedlings? In this post, I will look briefly at 5 reasons that you should growing tomatoes from seeds. There are other advantages; however I believe that these 4 are the most important.
If you are a new tomato gardener and want to become more experienced, nothing beats growing tomatoes from seed. Yes, your first batch may not produce a bumper harvest, but the valuable experience you get will carry you far in the future. By growing tomatoes from seeds, you will learn to be a much more cautious gardener.
1) Can have a Fully Organic Garden
When you purchase organic tomato seeds, you can be sure that your tomatoes are full organic. This is important to many people, as most of them are looking for a healthy tomato gardening which produces healthy tomatoes. Unless otherwise stated, many tomato nurseries growing these seedlings using chemicals.
2) Cheaper to Buy Organic Seeds than Seedlings
When you purchase seedlings, you need to understand that a lot of time, effort, and resources were put into ensuring successful germination. Starting soil can be expensive, and often time, you will pay indirectly when you are purchasing the seedlings. If however, you germinate your own seedlings, you can do so at a fraction of the cost (you are not going to be paying for someone’s time).
3) Keep your Tomato Garden Disease Free
By purchasing high quality organic tomato seeds, you can almost ensure that they will be disease free. This is important, or you could be introducing a disease that will ruin your entire tomato garden. If you are buying tomato seedlings you cannot be fully sure that your tomato plants will be disease free. If however, you buy the seedlings from a reputable source, you shouldn’t have too much to worry about.
4) Extra pleasure when your Tomato Plants Grow Tomatoes
Few things else can give you the pleasure of knowing that those lovely tomatoes in your fruit salad were grown from seeds, and that you put in all the hard work to grow them. It’s just pure joy when you bite into a juicy home grown tomato. I don’t know about you, but this can be quite a confidence booster.
As you can see, there are a number of benefits to growing tomato plants from seeds. It not only gives you satisfaction, it also saves you money, and is a healthier alternative when it comes to the large juicy tomatoes it will produce.
Kamis, 09 Desember 2010
Staking tomato plants-3 Options
True tomato gardeners know the value of staking tomato plants. If you are still new to growing tomato plants, then this article will be of extreme help to you. I will discuss three of the most popular ways one can use in staking one’s tomato plants.
Using wooden stakes
This is the most common method for staking tomato plants. Tomato stakes come in a variety of materials and can be bought in many different sizes. For the sake of this article, I will look at the more common bamboo stakes. These can be purchased from most nurseries or can even be made at home. A major advantage to way of staking your tomato plants is that it saves space. It’s a sort of a vertical gardening technique and allows you grow many tomato plants close to each other. You can also prune your tomato plants so that all your tomatoes grow of a single stem. If you do have the space however, I suggest that you use multiple stakes per plant, so that you can stake a few of the stems instead of cutting them off. This usually allows you to get more tomatoes per plant.
Using a tomato cage
This is another one of the old, traditional favorites when it comes to tomato gardening. Many gardeners swear by growing tomatoes using cages. There are a number of advantages to this method, a big one being that it allows you to grow your entire tomato plant without having to prune too much. It’s also handy in that it keeps your pet away from your tomato plant. I recommend that you build your own tomato cages however, as most so the store bough ones are very strong. This method is ideal if you have many tomato plants growing close to each other, as you can cage a few of the plants at once. This will also give the appearance of a more lush tomato garden, which is quite eye-leasing.
Using a piece of string
This has to be one of the simplest methods when it comes to staking your tomato plants. All you need to do is to tie a piece of twine to the upper part of the plant, and the other end of the sting can be tied onto a fence post, or something similar. Your tomato plant will grow (with a bit of your help of course) around the twine, creeping its way up. This method can be implemented on a tomato plant of almost any size, just as long as it hasn’t yet started to bear fruit.
More Garden Madness - the case of the Golden Nugget Pumpkins

The other month I dyed a white dress for a friend's wedding. It was meant to go a pastel yellow, but it ended up pumpkin orange. Still a lovely colour but in the end I opted for a different dress for the wedding. However, the pumpkin colour is a bit ironic at the moment, given pumpkins are the veg du jour in the balcony garden. If you thought growing corn in containers was crazy, wait till you see these golden beauties. It was only this year that I decided pumpkins would also be a delight to grow. I opted to grow a single golden nugget pumpkin, which has a bush habit and is ideal for pots.

I only wanted one and I wanted to put it in a large white box with some lettuce around it. Problem was these little gems came in a four pack. As it cost as much as a single seedling I thought no problems, I'll just use one and give the others away. Pumpkin pot number one was born (as you can see it has progressed a little since then.)

But then I thought maybe I could continue the zucchini experiment and try growing a pumpkin in a smaller container, and this container was already pumpkin coloured so it seemed perfect. There we had container number two.

But then I decided maybe I could try growing one up in the slightly shady bit with some beans and some silverbeet. So another pumpkin seedling went it. But then I decided that maybe this container could fit two pumpkin seedlings in it, along with the rest and that it might be better suited down near the airconditioning unit (that never gets turned on when plants are near it) next to the other single pumpkin.

So now I have 4 pumpkin bushes in my balcony garden! And they are in different stages of development. The pot with two in it, as you can see in the above photo, is running behind the others. Stunted by the lack of adequate light and late planting it has a long way to go. The single one has one pumpkin so far, and tonnes of male flowers (not enough female flowers though)

The first one planted has two pumpkins on it! See the development as they grow and grow.


I'll be happy if the harvest is just this size though given they keep growing at such a pace I wont be surprised if I get a few more. I can't wait till they are ripe, but I know it is a long time coming. I love pumpkin so I'll be interested to see what the golden nuggets taste like. Ever grown pumpkin in pots before? Any tips? Tricks?
Growing Tomatoes in Hay Bales is Cost Effective
Are you looking for an inexpensive way to grow great tomatoes? Well then, growing tomatoes in hay bales might just be perfect for you. In this article I will tell you about some of the many reasons that make growing tomatoes in hay bales cost effective. Other than its cheapness, growing tomatoes in hay bales have a unique set of advantages. The purpose of this article however, will be about the cost effectivness growing tomatoes.
When you are planning on growing tomatoes in hay bales, there isn’t much that you need in terms of materials. Well, you do of course need hay! You see, unlike many of the other, more traditional tomato gardening methods available, when you are planting your tomato plants in hay bales, you will be faced with a very different set of requirements.
The first and foremost item that you will need is a good quality bale of hay. Now, it’s not very easy to get this if you don’t know where to look, but let me just give you the most common place to get your hay bales from. Stores which sell animal feed! Hay bales are traditionally for feeding horses etc. so this store will be your most reliable source.
When you are going out to purchase you hay, you need to be aware that normal hay for feed can be costly. The trick here however, is to make your intentions know to the store owner. Tell them that you will be using your bale of hay for tomato gardening. They may have a few bales which were not bundled as neatly or are not as fresh, which they can sell to you at a much reduced price.
Since we are going to be growing tomatoes, which we will later eat, in the hay, our bale needs to be free from any chemicals. This is usually not a problem if the hay is being sold for animal feed, as more often than not means that the hay was grown organically. If however, you get your hay from another source, then be sure to check that pesticides and other harmful toxins were not sprayed on the grass.
Unlike normal tomato gardening, when you are growing tomatoes in hay bales, you won’t require soil and fertilizers. In fact, all you need is your hay, organic tomato seeds, and some stakes for staking your tomato plants.
There you have it folks, you now know how to go about growing tomato plants in hay bales in a cost effective manner. Just remember to tell the store owner why you want the hay, and you should get it a cheaper price.
Rabu, 08 Desember 2010
Bush Fig, Tree Fig, Hipster Fig, Fig Twig
Remember Mr Fig Twig? I introduced him way back when, when he was a pressie from the delightful Dr M-ski for my 30th birthday. He was called mr fig twig because, well, he was a fig tree but he was still a just a weeny little twig. Here is a shot of then of him in his figgy, twiggy glory. Skinny little guy, bit of a hipster really.

Well here he is now, complete with proto-figs between his leafy branches. No more mr hipster fig twig.


I love that with figs, the bit we eat is just an inside out flower. Awesome! He is starting to grow extra bits out the bottom, which I will let him do and make him more of a bush fig than a tree fig. He isn't grafted so I am not worried. Not sure if these tiny baby figs will fall off as he is still very little but if they reach maturity I think I will be having one of these.
Tomato Fertilizers-5 Organic Wastes that you can use
If you are new to growing tomatoes, and would like to grow you tomato plants organically, this article will definitely benefit you. A lot of inexperienced tomato gardener rush out their nearest gardening store to purchase ready-made organic tomato growing soil, but there are a number of other options that you have. Use these 5 organic wastes as tomato fertilizers.
Seaweed fertilizer
This is one of the most common organic fertilizers used in growing tomatoes. Seaweed fertilizers are usually sold as a liquid which you use when you are watering your tomato plants. There are a number of brands to choose from, and most of them work equally well. Depending on the concentration of the product, you may have to use the liquid anywhere from twice to four times a week.
Fish emulsion
This is also a popular type of organic waste to feed your tomatoes with. Fish emulsions can sometimes be bought from a store, but the easiest place to get them is from your fish tank (or your neighbors). This type of fertilizer is rich in nitrogen and will give you huge tomatoes that are super juicy.
Compost tea
This option requires that you put in a little effort, and it takes a few days to make. You need to collect a variety of different organic wastes (like veggie peels) and place them in a composting bin. When the matter starts to decompose, you add it to a large container of water. Stir the mixture thoroughly, and leave the container closed overnight. Do this for about three days, and you will have a nutrient packed organic fertilizer to feed your tomatoes with. Just be sure to use normal water as well, or the soil will become too nutrient rich.
Animal manure
Most gardening stores sell compost that is made primarily from animal manure. I recommend that you purchase it from a store, as opposed to trying to make you own, as it could pose a danger to your health. It is inexpensive to buy animal manure compost, and it will help fill your tomato garden with juicy tomatoes.
So, there you have it. These types of organic tomato fertilizers mentioned will give you some really awesome results. All of them are great for feeding your tomatoes with, and since they are all organic, you can choose any one of them.
Selasa, 07 Desember 2010
Carry on Corny Corn
Some said I was completely mental and most just muttered I was mildly deranged, but this year I decided to grow corn! In pots, on the balcony. Two pots to be precise, 4 stalks to a pot. Crowded ... well yes. This meant lots of watering and constant fertilising, particularly as they grew bigger. I followed their progress eagerly. They grew and grew.


and as a consequence provided some nice shade and privacy to my otherwise overly visible study.

Then the pollon bits on top formed.


and the jusky bits of goodness put out their tendrilly silks for pollination.

Even with the windy days and even with their intentionally close proximity, I thought I'd help out and hand pollinate too. Group pollination ... Ok I wont go there. :) But here is a pic for interests sake.

Now we are nearing the end stages, will I have a cob of tasty corn in the next few days? How long does it take from pollination to eatability? The silks are already starting to brown.


How fat do I need to let them get (they seem a little skinny at present?) How brown do the silks have to get? Anyone still think I am mad now? (I still think I am a bit potty, but in the harmless way.)
Langganan:
Postingan (Atom)